Monday, August 31, 2009

End of August.......

Today marks the last day of another month gone by. The end of summer is near and the beginning of the new school year. And of course, the end of this month's challenges. I liked the make & takes that were created. These awesome projects were created by some of the talented TeamWorks members. I loved doing the first challenge which involved using Fancy Pants Mixed Media Albums. These albums are fun to work with because of the different pages that you are working with. There are 3 transparent pages, 2 felt pages, and 2 chipboard pages. This makes it challenge you to use different types of media and techniques that you may not have done yet.

With my album, I created a perpetual calendar out of it. The calendars I stamped and are mounted using clear corner photo mounts. This makes it easy to remove the calendars at the end of the year and put new ones in. It was fun using this album. And of course, afterwards you think oh I wanted to do this or that to the page and I forgot. (Like I was going to sew on the felt pages before I put the papers down.) But you learn and move on. I still like the end result and want to share a few pages with you.

"Finished Calendar project" by Sharon Hill
Aug09 Challenge Finished Project
Pages 4-5:
Aug09 Challenge Pages 4-5
Pages 6-7:
Aug09 Challenge Pages 6-7

You can check out the rest of the pages and what materials I used to make the calendar in the MemoryWorks Idea Gallery. Go to http://www.memory-works.com/ and click on "Inspiration." The Idea Gallery can be found there.

Happy Scrappin!
Signature resized smaller

Friday, August 28, 2009

Message Board, Jr.

I was inspired by Lacey's Message Board project last week...so I made my own version, aimed at the younger set!
This project is SO easy! You can literally make one in 30 minutes! All you need is a cheap framed cork board, some paint, a paper set (mine is BoBunny "U Bug Me"), adhesive and a few embellishments!

1.)If needed, paint the frame on your bulletin board (mine is from IKEA). It helps to put masking tape around the inside of the frame, on top of the cork board, to minimize "bleeding".

2.) While the paint is drying, cut 4" strips of paper to fit across the top of your bulletin board, and 3/4" strips of a coordinating paper (or use ribbon). Ink edges if desired.

3.) Prepare your embellishments. The BoBunny kit came with a sheet of tags and journaling blocks - I just cut a few out and added some screw-shaped brads I had from my stash (the tags came with all kinds of embellishments printed on them...you can easily add "real" eyelets, staples, etc. on top of the printed ones for a great look!).

4.) Once your paint is dry, sand the edges of the frame, if you want to.

5.) Use liquid glue to attach the 4" strips of paper to the top of the frame, followed by the 3/4" strip or ribbon. Adhere embellishments as desired. Use letter stickers to spell a name or "Notes" or anything else you like!

Now your bulletin board is all done!

If you want to dress it up even further...

You can customize clear thumbtacks! This couldn't be any easier...just dip the tops of the thumbtacks in any color acrylic paint:

then stick the tacks into a foam plate to dry!
You can also make a "dry erase" memo area (mine has "soccer today" written on it in the first picture). Just cut up a sheet protector to the size you want, put a piece of patterned paper inside for a background, and seal up the sheet protector edges with liquid glue. Tie a dry erase pen to a thumb tack and you're in business!

My master plan is to make a bulletin board like this for each of my children and display them in our hallway. The kids can tack up their artwork, notes, chore charts, etc. and I can write them notes as I pass by! AND I can jazz up some under-utilized wall space!

Tuesday, August 25, 2009

With Fall, comes the return to school. I know I used to really dislike writing my kids names all over their bookbags with permanent marker. No matter how neatly you thought you were writing, it still came out looking messy. Sarah Crawford, one of our multi talented creative design team members created a Bookbag Tag Chipboard Mini-Album. What a great alternative to the messy marker method. Sarah made this little album for her son's backpack in about an hour - give it a try!

You'll need: -1 piece of "raw" chipboard (You can use the "backing" that sometimes comes with patterned paper pads or in packaging - nice "green" option!), coordinating patterned papers (keep in mind the color of the backpack and the favorite colors of the recipient!) She used the "Grease Monkey" line by Bo-Bunny to match her son's blue backpack. Adhesive (Tombow liquid glue works great - or whatever you like for chipboard) -WRMK Cropadile -WRMK Corner Chomper (to round corners of chipboard, if desired) -2"x2" photos (black and white photos work great with ANY colors) Also, if making for an older child, this is a great opportunity to get their input on what photos they want! -binder ring or chain or key ring chain to hold album together -Mod Podge or sealant to prolong the life of your finished project - just paint right on over the patterned paper and photos and allow to dry to seal.

Instructions: 1. Cut chipboard into 2"x2" squares (She used seven, depends on how many pictures you want to use). She used her paper trimmer - just cut on one side, then flip and cut on the other to cut all the way through the chipboard.


2. Cut 2"x2" squares from patterned papers. Adhere to one side of 2"x2" chipboard squares. Adhere one photo to opposite side.


3. Use corner chomper to round corners. Sand edges to create a "clean edge" (helps seal it to the chipboard). Use Crop-A-Dile to adhere eyelets to bottom left corner of photo side.


4. Decorate and add name or info as desired


5. "Paint" pieces with Mod Podge or other sealant to seal them and give them more durability.


Tip: if you printed the photos at home, wait a day or so to allow the ink to completely dry before painting with Mod Podge.

Thank Sarah for a great project!!!!!!!

Happy Scrappin!


Friday, August 21, 2009

Message Board

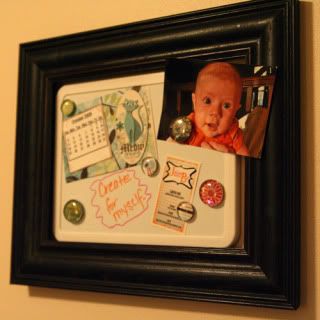
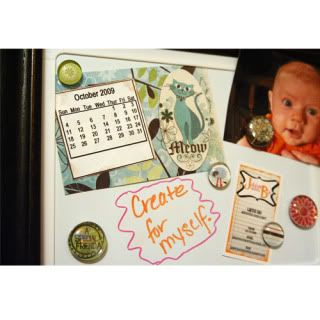
School has either started or it is close around the corner. Give your student a message board that will turn heads.

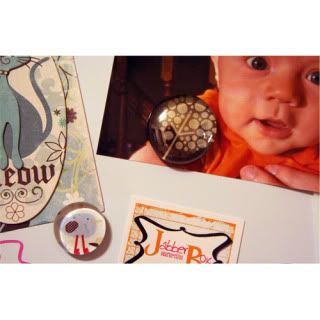
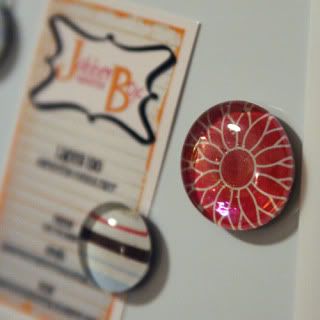
Whether they are in college or high school, jazz up their boards with marble magnets and 4x6 monthly calendars so they stand out from the crowd.


Photobucket
Photobucket
Photobucket

Photobucket
If you don't have a student in your life. Make this an inspiration board as I did above! Keep things on it that keep you inspired. Use it as a family hub, write to-do lists and notes to each other. The possibilities are endless!

Lacey Igo
TeamWorks Member

Monday, August 17, 2009

August Challenges...Mixing It Up!

Hello everyone....can you believe August is more than half over??? Well, the message board has been busy, busy, busy with another month of challenges! This months challenge's are about mixing it up... using the Fancy Pants Mixed Media Albums to be exact! These albums are so cute and versatile and leave oodles and oodles of creative license for you happy scrappers! Our own creative team member, Wendy, has given us some great tips on how to work with the transparency pages in the albums and she'll have some upcoming tips with working on the felt pages. Here's a little sneak peek at my own album..another baby album! This is a shot of the transparency page...


We also have some great ideas for party make and takes...marble magnets and a sweet calender by none other than Sandy and Lacey!


And so as not to forget that Back to School time is nearly upon us...we have a Back To School layout challenge using a Becky Fleck pagemap!


So if you need a little push to get your creative juices flowing...stop on over at the message boards and join us for the month of August!

Sue

Saturday, August 15, 2009

Summer Show & Tell

I don't know if you're like me, but I'm finding it really hard to accept that summer is coming to an end! It seems like this has been an especially busy one for my family and that has definitely limited my scrapping time! However, I have completed one project that I'm really pleased with and thought I'd take some time to do a little summer show and tell.

I'm sharing a few pictures of this mini chipboard book I made for my niece who just celebrated her 4th birthday. The party had a beach theme and I knew immediately what papers I wanted to use. BoBunny's Mango Luau theme set and embellishments were absolutely perfect for this little project. I have said over and over again that my favorite thing about MemoryWorks is how the exclusive sets are so beautifully coordinated. Here's a good example of why I love that feature so much. Besides some flowers & ribbon I had on hand, brown ink, and a few scraps of solid cardstock, I used only the paper set, rubons, sticker sheet, and brads that were part of the theme. Oh...and the chipboard book is by 7 Gypsies. (6X6 in.) I decorated all 10 pages of the book (20 sides), left lots of open space for photos and journaling, and still had a good pile of product leftover, which I'm going to send with the book, so my sister and niece can add more with the photos if they wish.

Hope you like what you see! Thanks for looking...and enjoy these last fleeting days of summer!


PS...Several of the new products from Summer CHA are showing up in the MemoryWorks product showcase...click here to check them out!


Wednesday, August 12, 2009

BasicGrey Winner!

Congratulations to Regan Tomlin.....our winner of the BasicGrey sample pack! Our trusty http://www.random.org/ generator selected the number 59 as our winner. Yay Regan...enjoy your sampling of the beautiful new BasicGrey papers, including Indian Summer, Eerie, Eskimo Kisses and Nook and Pantry!


Also thanks to everyone who posted their suggestions - we love your input! It's always a hard process selecting which companies and product lines are featured in our catalog. I always say we can't carry every great product line out there or we'd be producing the JCPenny catalog every year :) - and inventory management would be a nightmare. So unfortunately, we have to be fairly selective of what we offer and not everyone makes the cut...that's why we love your input so we can focus on the companies and lines that appeal to our consultants and customers! So much more goes into the overall selection of product lines and so much we have to consider...one of which were watching closely this time around is their shipping and backorder track record. With the economy we've had a lot of companies produce a lower quantity of products - making it hard for us when their product line is featured in the catalog, yet they aren't reproducing or reprinting the products. We made the announcement earlier this month that becuase of some of these issues we have decided to produce 2 catalogs per year - right after each major tradeshow release. So this will ensure we have as accurate and streamlined product line as possible.

We are so excited to introduce the new catalog - we're already working our little hearts out to make this catalog release as timely as possible.


Amber's Top Five Favorites!:

With that in mind here are my personal top five favorites this fall that I can't wait to add to my collection:

1. Pink Paislee - Everything!: I think they hit it out of the park with all of their collections. I love the vintage feel and their color combos - especially loving the die-cuts and canvas patches. Can't wait to get their shippment!


2. BasicGrey - Indian Summer: Really everything BasicGrey brings out is fabulous, but this seasons new release is espcially great...and one of the favorites include the Indian Summer collection. At first the color combinations seemed really intense to me, but now I am absolutely in love with the rich browns, pinks and burgandy colors. ( We haven't received our new BasicGrey shippment yet - and are still working on getting all of the images in the system...but very soon some of their awesome products will be available for sale!)


3. Prima - Canvas Collection: I loved their new canvas selections last time - and there new release has some great additions like the iron ons for non-artsy-messy-painty (yes - that's a real term:) scrapbookers like me. I love my scrapbook paints - but I don't have the time to get into the "messiness" of all cool artsy-painting projects that some really talented scrapbookers enjoy. I love the look and would love to include the look in my projects - and the iron ons are perfect for this! No messy paint and clean up - just iron on!


4. Bo Bunny - Everything!: Another winner here...in fact we just put up the new Bo Bunny for sale in the shopping cart and our customers agree. Some have grabbed one of everything - and I can understand. I simply must have one of each of their new goodies....and just in case you were wondering....they're every bit as yummy in person!


5. Jenni Bowlin - Bingo Cards and Chipboard Buttons: The new Jenni Bowlin bingo cards and chipboard buttons are a definate favorite! So fun, versatile, ecclectic and easy to use. Love that the chipboard buttons now match their collections...and their bingo cards come in themes and colors!


Wow - this is hard. I could go on and on...obviously everything we put in our catalog makes my "top" list...but I just wanted to share a few of my favorites and things that are on my must have list!


Happy Shopping!

Amber :)


PS - WAIT...can I just add one more must-have item?...I can't beleive I forgot about this:


The new foil kits by Creative Imaginations. Everyone who came to our Retreat 2009 knows how awesome these are. Seriously so EASY and NO MESS....all you do is rub-on the Sticky 2 adhesive rub-on of your choice, place the foil COLOR SIDE UP and gently rub with your finger to create your own foil effects that are so popular. You don't even need an applicator to rub the foil on...it goes on so smooth. It will look like you rockstar and spent hours on difficult techniques - but really it takes only 2 simple steps! I also love that Creative Imaginations made their new foil kits more retail friendly with a large assortment of foil colors with a sample adhesive rub-on at a very freindly price (only $4.50 :0)!!

Friday, August 7, 2009

Crop Club Business Idea!!

I can not believe that August is here and my kids will be heading back to school soon, which for us is August 19th. :( Even though it makes me sad to see them go, it helps me get back to my Memory Works business!! I started a great crop club a couple of years ago that has really kept my business going and keeps my friends interested in Memory Works. Here is how it works...each month I host a crop at my home where each guest pays $10.00, $5.00 of which goes into a "pot" and the other $5.00 pays for my crop expenses. From "the pot", each month a guest get to purchase $50.00 in Memory Works products. I determine who gets to receive product each month by who signed up for the club first, second and so on. To make the club work, you have to have at least 10 people sign up and do the crop for 10 months so that each person has their month. My club has grown to 16 ladies so I have a few months where two people get to receive product!! I start the crops in August and go through May which leaves the summer free, when it is hard to get everyone together. I have found that my friends love this way to get Memory Works items because they are only paying $5.00 a month for $50.00 worth of product and sometimes get their items way before they have paid for all of them! (I have made a form that everyone signs promising to fulfill their commitment to the crop club for the 10 months) I hope my crop club idea gives a lot of consultants incentive to start your own club...we have a lot of fun!

Monday, August 3, 2009

August Ideas and Inspiration

Another month has come and gone. I can't believe that another month has gone by. Before we know it, we will be decorating for halloween and handing out candy. But for now, we can enjoy and cherish the days left of Summer 2009 before the kids go back to school. What better way than to take a trip to the lake. And that is exactly what TeamWorks Member Elaine McManus did and she has the layout to prove it. Elaine's projects for this month are beautiful. The colors and patterns of the products used along with Elaine's creativity, gives her projects a stunning look.

"Condo at the Lake" 12 X 12 Layout by Elaine McManus
Elaine's "Condo at the Lake" Layout

"Happy Birthday" Card by Elaine McManus
Elaine's "Happy Birthday" Card

"Summer" Altered Mini Book by Elaine McManus
Elaine's "Summer" Altered Mini Book

These projects were made from the Pebbles Linnie Bell Theme Set and Stickers. Elaine also used Pebbles Chips in Orange and Pebbles Candy Dots in Red as well as Making Memories Tiny Alpha Letter Stickers. If you are interested in more information about products used or want the directions to Elaine's projects, go to www.memory-works.com and click on Inspiration or click here.


Happy Scrappin'!

Signature resized smaller